How to Make OneDrive File or Folder Available Offline on MacOS — Having your important files store on the online storage make us feel less worried. If a bad thing happens to our laptop we still have the file from the online storage we already used. We just need to log in to the online storage on our new laptop and make the files available offline. But, if you are using OneDrive as your online storage, and want to make some files of folders there to be available on your Mac or MacBook, I will show you how to do that.
How to Make OneDrive File or Folder Available Offline on MacOS
Here are the steps that you can follow in Making OneDrive File or Folder Available Offline on MacOS:
- Make sure OneDrive is already installed on your Mac or MacBook, and you are already logged in into your account.
- Press Command + Space, type OneDrive, hit enter key on your keyboard.
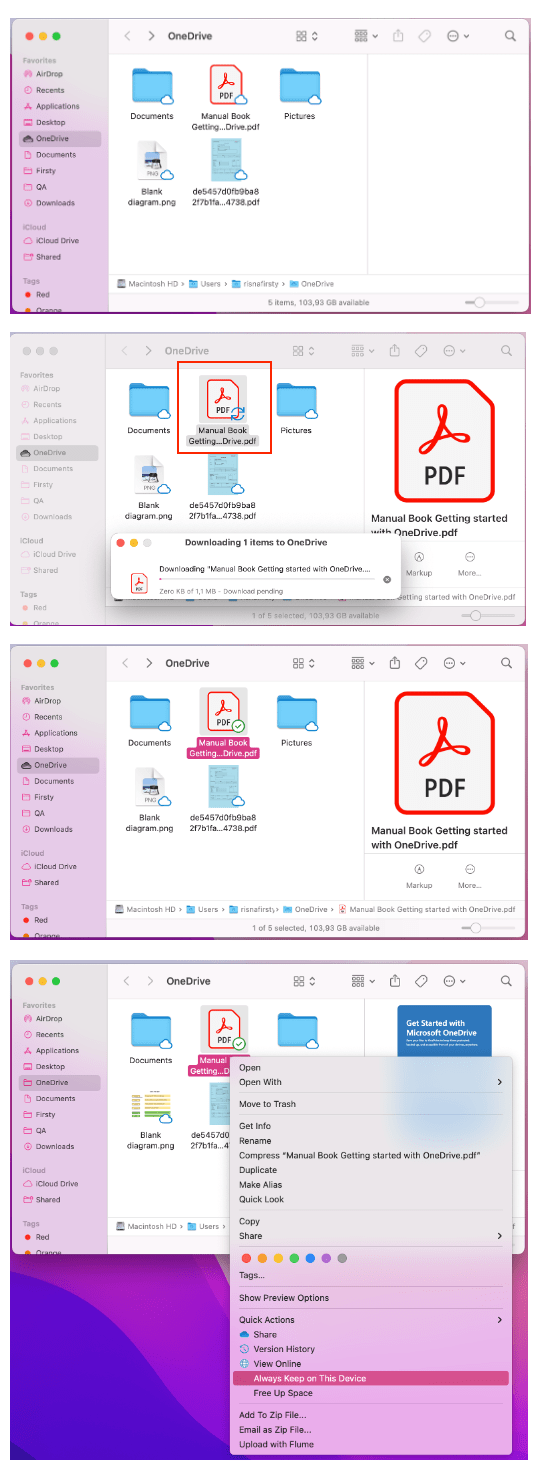
- After that, find the file or folder that you want to make it to be available offline on your Mac or MacBook.
- Then, double-click the file or folder.
- Wait a moment until the download process is done.
- Once the download process is done you will see a checklist sign on the file or folder you downloaded previously.
- Now, do right-click to the file or folder that is already downloaded.
- Click the Always Keep on This Device option.
- Finish. Starting from now on, your file or folder on OneDrive is available offline on your Mac or MacBook.

That’s it. Now you know the way in Making OneDrive File or Folder Available Offline on MacOS. Don’t forget to share this trick with your family and friends so they will know how to do the same thing. Let me know in the comment section below if you find some difficulties in following the steps or if you have any questions that are related to the topic. I will be happy to answer and help you out.
Thanks a lot for visiting nimblehand.com. As this pandemic doesn’t seem over yet, stay safe, stay healthy and see you in the next article. Bye 😀


