Want to be more efficient and faster while executing your tasks on your Mac? Just add the second monitor so you will not spend your precious time switching between apps, tabs, and windows.
Quick-Step
Prepare a monitor > Check if the MacBook is capable of driving an external monitor > Get dongles for the MacBook > Prepare the display from System Preferences
> Adjust the Settings and Resolution
Using Multiple Monitors with Our Mac or MacBook
Don’t know how to do it yet? Here I show you How to Use Multiple Monitors on Your Mac and MacBook step by step:
1. Prepare a monitor to be used as the second monitor. You have to prepare a correct monitor based on your job. Identify your needs for a monitor. Please consider at least the resolution, size, pixel density, display and panel type, refresh rate, and the color accuracy.
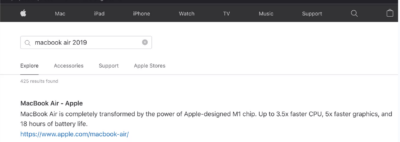
2. Make sure if your MacBook is capable to drive an external monitor. Dig more info about your MacBook capability by clicking the apple logo button, choose About This Mac. You can also find it out from Apple’s website.

3. Get the compatible and dongles for your MacBook. If you don’t have any stuff to connect your MacBook to the monitor, you can purchase it depend on the model of the MacBook you use. For your information, these are the kinds of display connections you will find: (1) HDMI, (2) DisplayPort, (3) Thunderbolt. Here, you have to match the USB-C hub to the connector type you will use.
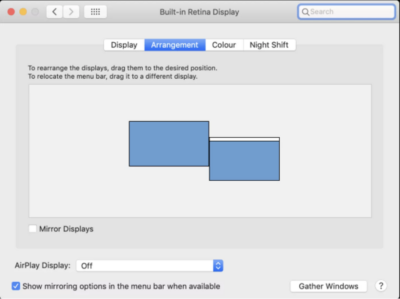
4. Prepare the display of your MacBook. Now, start up your MacBook, open System Preferences > Displays. Click the Arrangement tab on the primary monitor. Do not tick the Mirror Displays so you will not see the same display on your second monitor. Then, drag and drop the order of your monitor based on the position of your MacBook and your monitor on your desk.

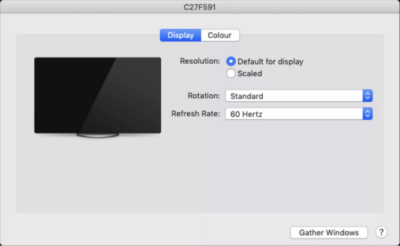
5. Set the resolution, color profile, and rotation. Adjust the settings of the resolution and refresh rate. So, it will fit the size of your second monitor.

6. That’s it. Find it useful? Share it to your friends so they will know how to use multiple monitor for their MacBook.
Stay safe, stay healthy and see you on the next article. :))


