Not all the photos we capture will have the perfect result. Some of the photos have to be edited or cropped to omit some unnecessary appearances to look better. There will be no problem modifying a photo if you are mastered photo editing and you already have a bunch of experience in editing photos on Mac. But if you aren’t that will be an issue. Those who are familiar with photo editing will create some changes to the photo appearances without cropping any part of the photo, and for those who aren’t familiarly cropping a photo itself is such a painful struggle.
But don’t worry. If you need to crop any of your photos on Mac but don’t have any clue how to do that, you’re lucky cause you are at the right place. Now, let me tell you How to Crop Any of Your Photos on Mac or MacBook in the simplest way. Here are the steps.
Quick-Step
Open the photo > Click pen icon button > Click the dotted-line square icon
> Rectangular Selection > Select the zone > Crop
Cropping Any Photos using built-in Feature on Mac or MacBook
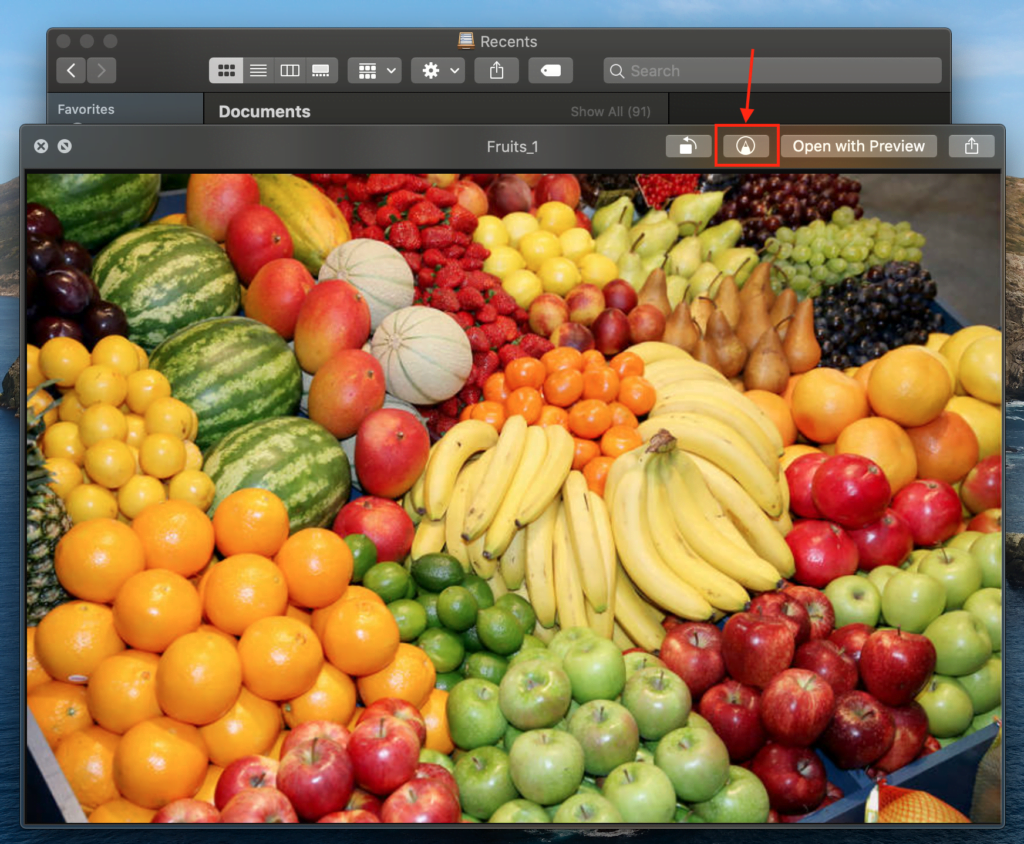
1. Open the photo that you are going to crop. If you are not sure about the photo you pick is correct or not. There is a tip for you. You can preview your photo by click that photo once, and then press the space key on your keyboard. If you open the correct picture go to the next step. If you open the wrong photo press the space key again to close it, then repeat the process again.
2. Click the pen icon button.
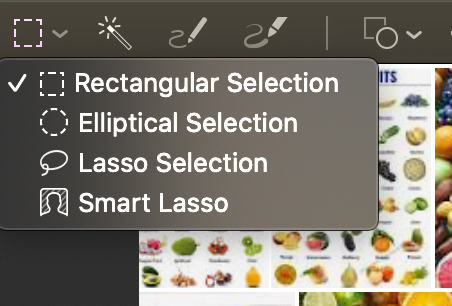
3. Click on the dotted-line square icon, the first icon from the left.
4. Now select the Rectangular Selection.

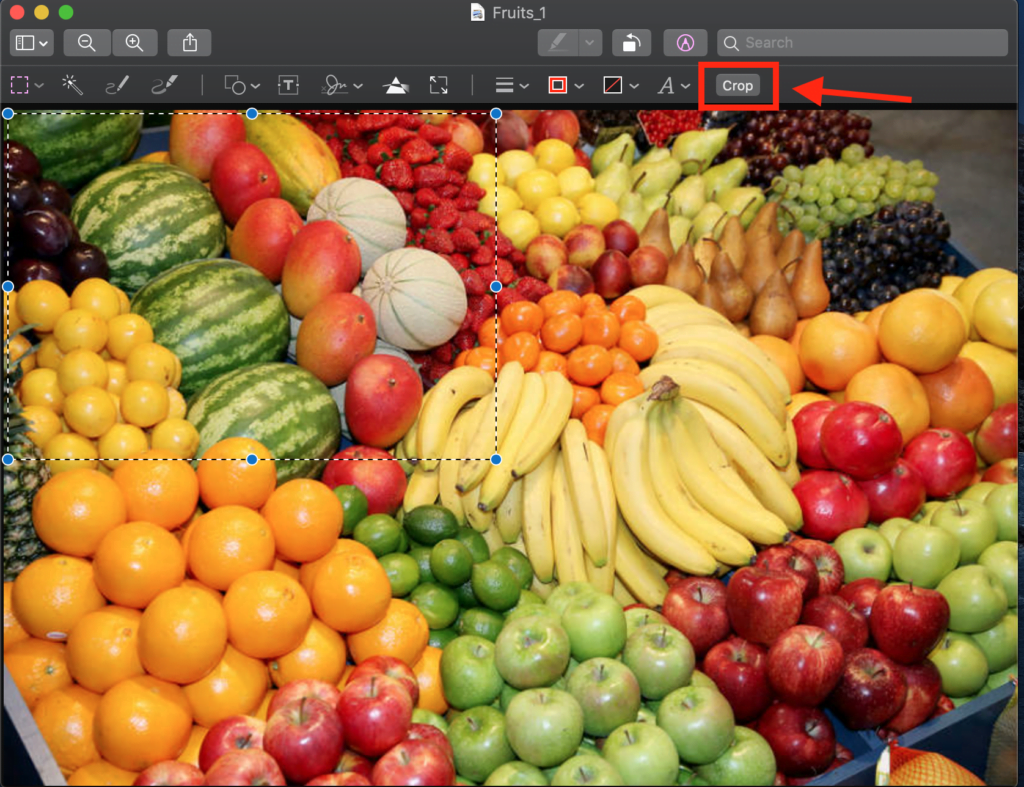
5. Select the zone on the photo that you are going to crop.
6. After the zone has been selected click the Crop button, the first choice from the right.

7. Now, your photo has cropped successfully.
That’s it. Hope it’s helpful for you. If there is any problem you find in following the steps, just let me through the comment section below.
As always, stay safe, stay healthy and see you in the next article. :))


