How to Crop, Straighten, and Rotate Your Photo on Instagram — Who doesn’t know Instagram? It is one of the most used social media in the world. This platform allows us to post photos or pictures of any moments we’ve been through in our own life. It is not a big problem when we haven’t edited the photos that we want to post on Instagram yet. Why? Because Instagram brings the crop, straighten and rotate features in it. So, we can edit our photos using those features along with the steps of uploading our photos.
For the detailed explanations of How to Crop, Straighten, and Rotate Your Photo on Instagram, you can read and follow the steps below:
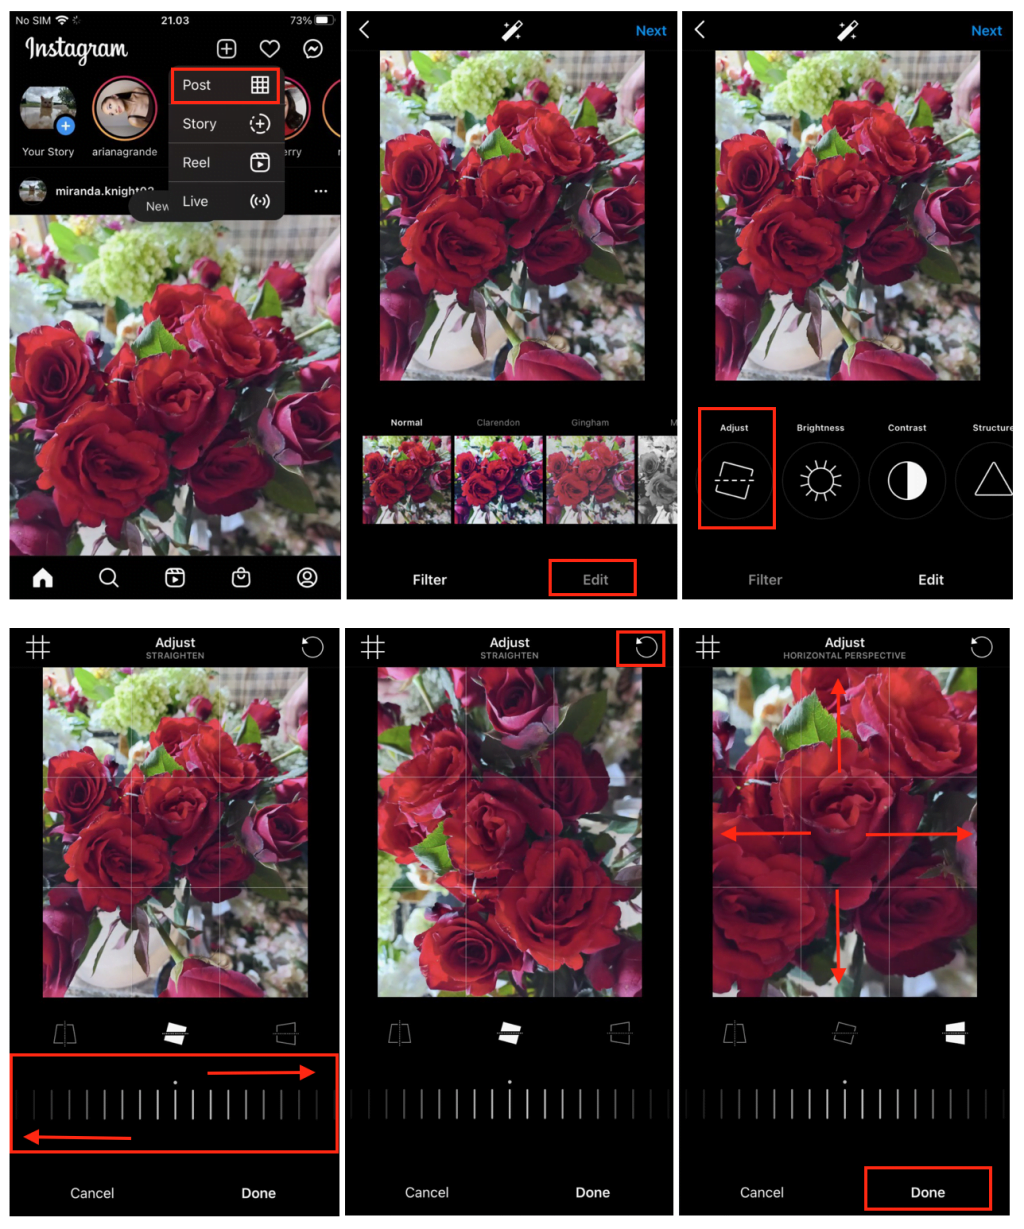
On iOS
- First, launch Instagram on your iPhone.
- Then, tap the + button on the middle bottom of the screen.
- After that, select the photo that you want to crop, straighten, and rotate before uploading it.
- Now, tap the Next button.
- See the edit option, on the bottom of the screen. Tap it.
- You will a lot of options that you can choose to edit the photo. But to crop, straighten, and rotate the photo, please tap the Adjust option.
- To crop the photo you can simply zoom it in.
- To straighten the photo, please swipe to the left or right slowly the short vertical lines handle.
- To rotate the photo, tap the rotate icon button on the top-right corner of the screen.
- After you finish editing, tap the Done button.
- You can tap Next a to continue posting your photo.

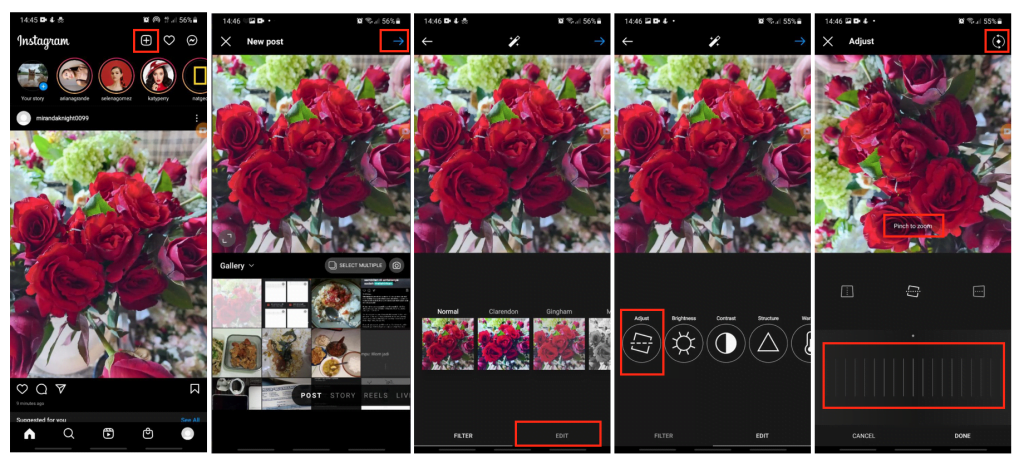
On Android
- Launch Instagram on your Android smartphone.
- See the top-right side of the screen, find the + button, then tap it.
- After that, select the photo that you want to crop, straighten, and rotate before you upload it.
- Then, tap the right arrow on the top-right corner of the screen.
- Now, tap the edit button on the bottom-right corner.
- Tap the Adjust option, the first option from the left.
- To crop the photo, please zoom in the photo with your fingers.
- To straighten the photo, swipe to the left or right the short vertical lines handle slowly.
- To rotate the photo, tap the rotate icon button.
- Once you finish editing, tap the Done button at the bottom.
- Now, tap Done if you think you are done editing.
- Tap the right arrow button to continue posting your photo.

Finish. Now you know How to Crop, Straighten, and Rotate Your Photo on Instagram. Make sure to share this trick with your close people so they will know how to do the same thing. Please let me know in the comment section if you have any questions that are related to the topic. I will be happy to answer and help you out.
Thanks for visiting nimblehand.com. As always, stay safe, stay healthy and see you. 😀


