When watching video content, subtitles allow viewers to follow along even if they cannot hear the audio. Adding subtitles to YouTube videos not only makes them accessible to viewers with hearing impairments but also makes them more user-friendly for viewers who aren’t fluent in the video’s language. In addition, subtitles can be useful for viewers who don’t want to disturb others or are watching videos in noisy environments.
The majority of YouTube’s viewers are from outside the United States, so subtitles are an important part of reaching a global audience. Videos with subtitles have also been shown to have a higher engagement rate and a longer watch time, leading to better SEO rankings and more views. We will show you how to add subtitles to YouTube videos in this article.
Subtitles make videos more accessible and convenient for your audience. Aside from increasing engagement, adding subtitles to videos can also boost SEO as it gives the search engines more context about your content.
The good news is, everyone, can harness this nifty feature on YouTube in just a few easy steps. Continue to read the next section to follow the steps.
Quick-Step
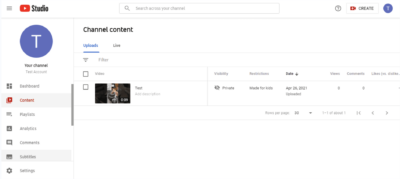
Head to YouTube Studio > Click Subtitles > Set the language
> Create your subtitles > Publish
YouTube Video: 3 Easy Steps to Add Subtitles to Your Videos
1. On your YouTube Creator Studio, select the Subtitles tab from the sidebar.

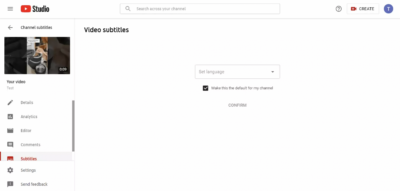
2. Set the language. For the purpose of this tutorial, we are going to use English.

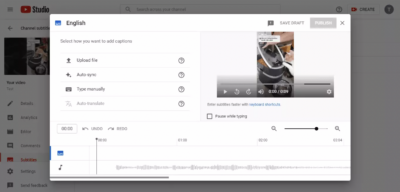
3. Start adding your subtitle. You can do this manually or by uploading a .srt file you have created offline using software like Subtitle Edit or AegiSub, for example.

And you’re done! Hope this guide works out for you. Do let us know if you face any issues in trying the steps and thank you for reading!


