

Auto-forwarding ensures that you never miss an email, regardless of where you are or what you’re doing.
Setting up Inbox rules in Outlook on the web allows you to automatically forward or redirect your email messages. This is important if you want to read and respond to messages from another email account while you are away, or if you want someone else to receive and respond to your email while you are away.
We’ll go over the ins and outs of automated email forwarding on the web in this article.
How to Automatically Forward Emails in Outlook on Web
Knowing how to forward an email to your website automatically could be beneficial. You may be on vacation and don’t want to deal with the inconvenient process of manual forwarding. Perhaps you’re trying to reach out to a larger business audience and want to make the process go faster. Setting up auto-forwarding can be quite handy for a variety of reasons.
- On your desktop, log in to your Outlook account.
- At the top of the page, choose “Settings,” then “View all Outlook Settings.”
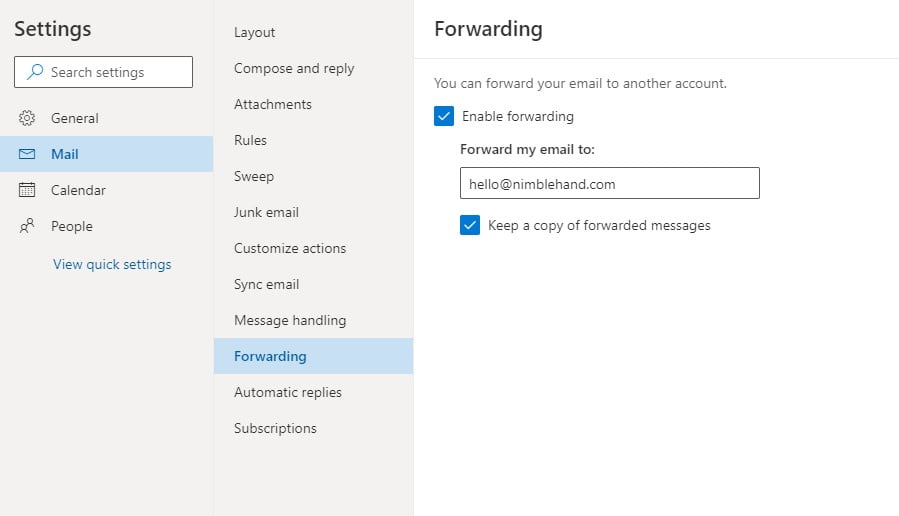
- Toggle between “Mail” and “Forwarding.”
- Select “Save” after clicking “Start Forwarding.”
Auto-forwarding should now be working after you’ve performed these instructions.
How to Automatically Forward Emails From a Specific Sender in Outlook?
You’ll need to create some rules to automatically forward emails from a specified sender. This procedure will be guided by the following method:
- Click “Home,” then “Rules,” in “Mail.”
- Select “Manage Rules and Alerts” from the drop-down menu.
- On the “Email Rules” tab, click “New Rule,” which will take you to the “Rules Wizard.”
- Select “Apply Rule on Messages I Received” and click “Next” once you’re in the “Rules Wizard.”
- Select “Forward to People or Public Group” from the drop-down menu.
- Fill in the recipients’ email addresses in the “Rule Address” field.
- After that, click “OK” and then “Next.”
- In the “Step 1” box, give the new rule a name and select “Turn on This Rule.”
- Finish by clicking the Finish button.
The way we communicate in this digital age is always changing, and email forwarding is essential for remaining in touch.
The entire operation becomes even easier with the revolutionary help of automatic forwarding. You don’t have to waste hours going through mass emails before getting a cup of coffee.


