The fiber connection at home is not being used, but there may be times when we want to control or limit Internet traffic in Windows. In other words, if you have contracted a fiber rate with your operator, the maximum speed may be limited, but you can use it as much as you want and it will not be “spent,” as is the case with mobile data rates. However, it is possible that you have a 4G rate at home or that you are simply using your mobile data to connect to the Internet. When it is convenient to set limits, this is the time to do so.
We can set the limit if it is a boy, a girl, or a teenager’s computer, but also if it is your own computer and you have a 4G data rate (for example, for a second home) or simply if you are tethering during a city trip. work and you don’t want to use up all of your mobile plan’s data. In these cases, Windows allows us to not only see what is being spent the most, but also set a limit that can be once, monthly, or yearly.
How to Set Data Limits in Windows 10
Limiting your computer’s bandwidth will keep you from wasting data. If you have a specific data limit, managing this setting can prevent you from being overcharged.
First, let’s look at how to use the tools included with Windows 10 to control your network usage and set a bandwidth limit.
Enable a Metered Connection in Windows 10
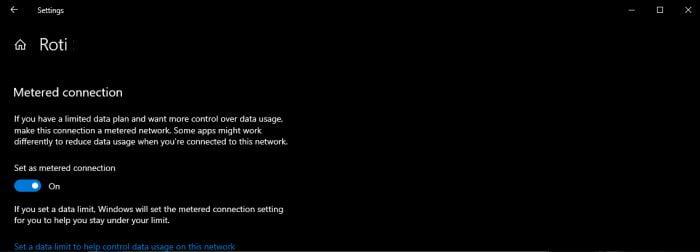
Enabling a metered connection is one way to limit bandwidth in Windows 10. If you have a data cap, this is ideal.
Enabling this feature means that some Windows updates (except critical updates) will not be installed automatically, and some Microsoft Store apps may lose functionality or stop working properly. It will also disable peer-to-peer updates, which are intended to reduce the load on Microsoft’s servers.
To enable a metered connection, follow these steps:
- To open Settings, press the Windows key + I.
- Navigate to Network & Internet.
- Depending on how you connect to the internet, select either Wi-Fi or Ethernet.

If you chose Wi-Fi:
- Navigate to Manage known networks.
- Choose your network from the drop-down menu.
- Select Properties.
- Slide Turn on the metered connection.
If you chose Ethernet:
- From the list, select your connection.
- Slide Turn on the metered connection.
Set a Data Usage Limit in Windows 10
You can also set a custom data usage limit. This will enable the metered connection feature automatically. It will not disconnect your internet if you reach the limit, but you will receive warnings as you approach it.
- Press Windows key + I to open Settings.
- Navigate to Network & Internet.
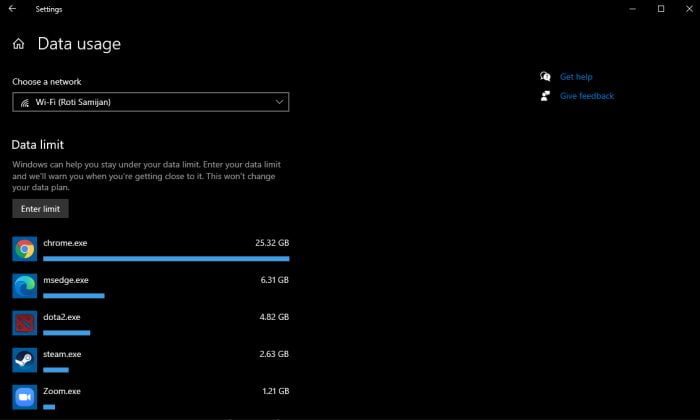
- Under Network status, you’ll see a list of your internet connections and how much data they’ve used in the last 30 days. Click Data usage for the one for which you want to set a data usage limit.
- Click Enter limit beneath Data limit.
- Choose a time period (Limit type), a monthly reset date/days until data expires, and a data limit (set the Unit as either MB or GB.)
- Save the file.

You’ll see a graph showing how much data has been used and how much is still available. To change the settings, click Edit limit or Remove limit.
These are excellent methods for controlling your bandwidth in Windows 10; ideal if you’re not sure what’s consuming your bandwidth and want to monitor your home network usage. Begin with the default Windows 10 tools, then progress to a third-party program if they are insufficient.


