How to Hide and Unhide Photos on Mac or MacBook — Most people love to capture a moment into some photos. By having photos of it, they can remember the events and also the feeling when they are involved in the event. For those who are using Apple products, commonly they store photos using iCloud. As the result, when they access photos on their Mac they can also view the photos they captured using iPhone previously. In some cases, they don’t want to see the photos that appear on their Mac but also don’t want to delete them. The alternative solution that I can suggest is by hiding the photos.
Now, the question is how can we hide them? Well, you are in the right place. I am going to show you How to Hide and Unhide Photos on Mac or MacBook step by step:
To Hide the Photos:
- First, open the Photos app. If you can’t find the app, press the Command + Space bar, then type photos on the search field and press enter.
- Select the photo that you want to hide.
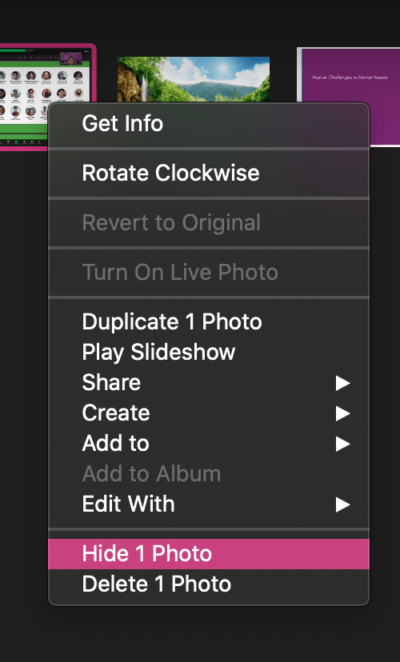
- Now, press Control + click on the photo.
- Then, choose the Hide Photo menu.

- After that confirm that you want to hide that photo. Please be aware if you use iCloud Photos, the photos that you hide will be hidden on the other devices that use the same AppleID.
To Unhide the Photos:
- Launch the Photos app on your Mac or MacBook.
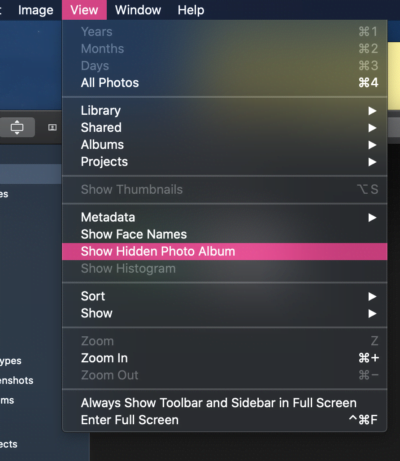
- Click View on the menu bar, the menus that are aligned with the Apple icon button.
- Choose Show Hidden Photo Album.

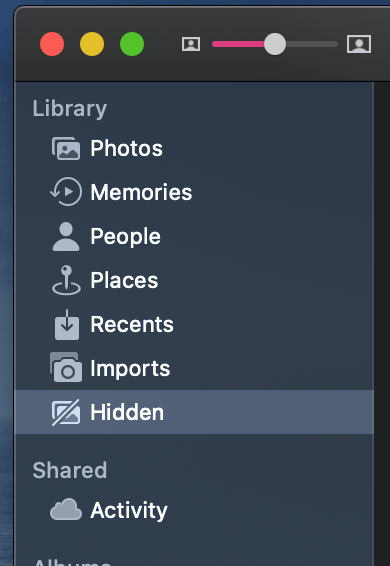
- Then, on the sidebar, click the Hidden menu.

- Now, select the photos that you want to unhide from there.
- After that, press Control + click the photo, and choose the Unhide Photo menu.


